HOW TO UPLOAD A VIDEO
Uploading videos to JW Player is simple: click the “Upload” button at the top of the page, navigate to your desired video in your file explorer, and upload it.
Once JW Player identifies the video, it must be processed before it’s available for use. Be aware—the processing time depends on the size and length of the video.
HOW TO MAKE A VIDEO PLAYLIST
1) Log into JW Player Dashboard.
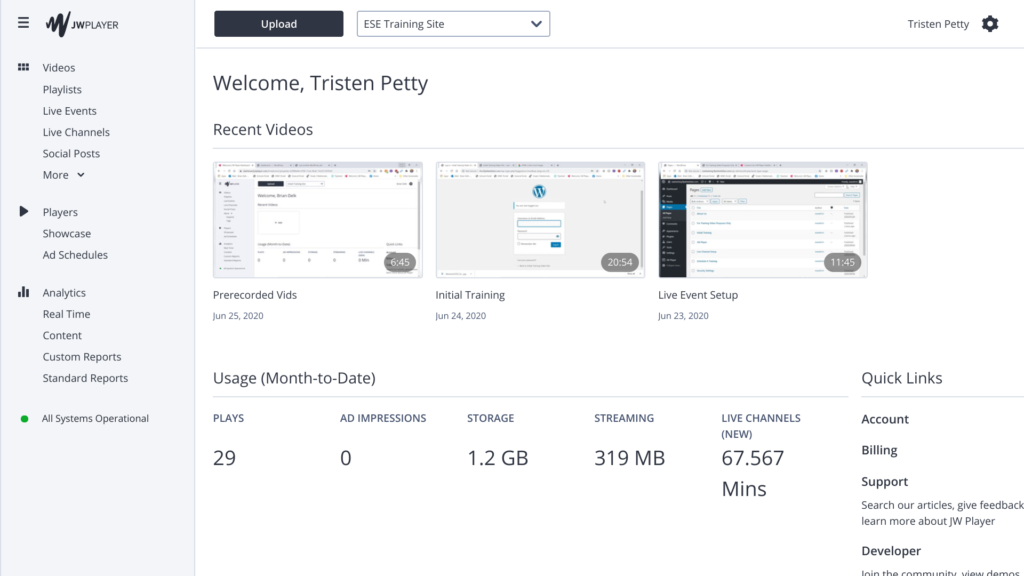
2) On the sidebar, click “Playlists” > click the red button “Create” > “Dynamic Playlist” > “Create” > title the playlist.
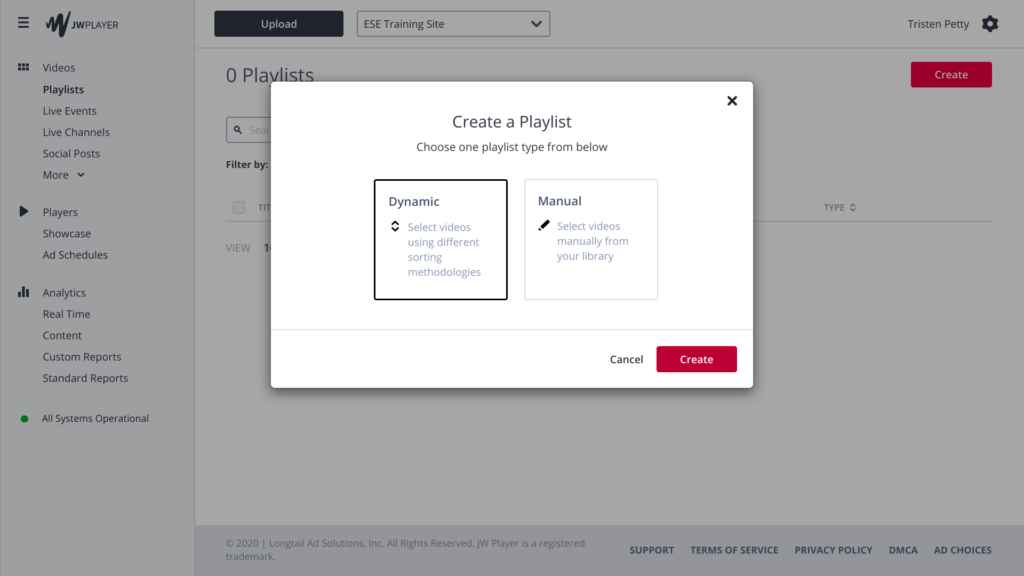
3) “Sort by” lets you organize how your videos are sorted in the playlist. There are six options.
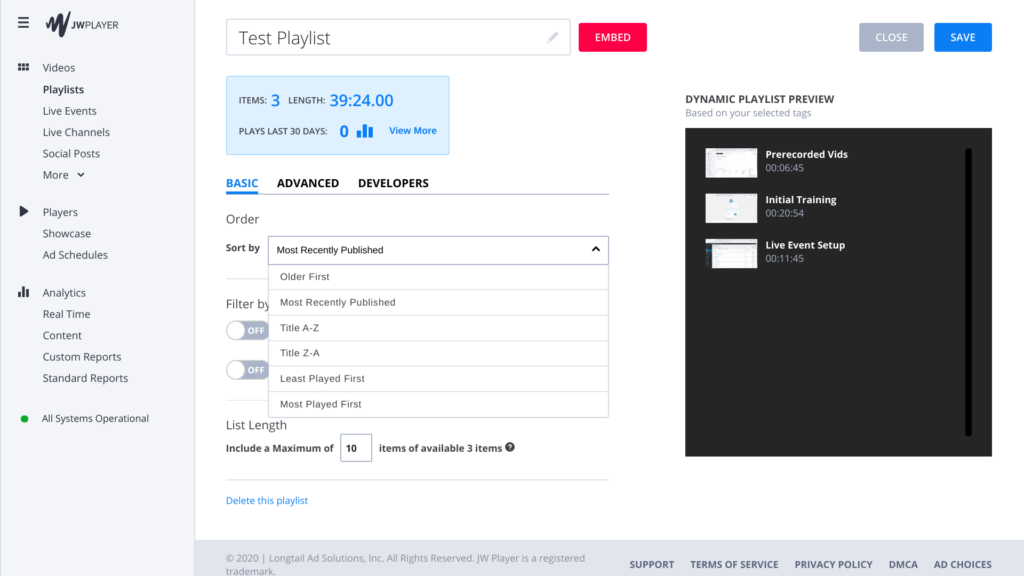
4) “Filter by Tag” controls which videos appear in the playlist. There are two choices: “Include videos by tag,” or “Exclude videos by tag.”
5) “Include videos by tag”
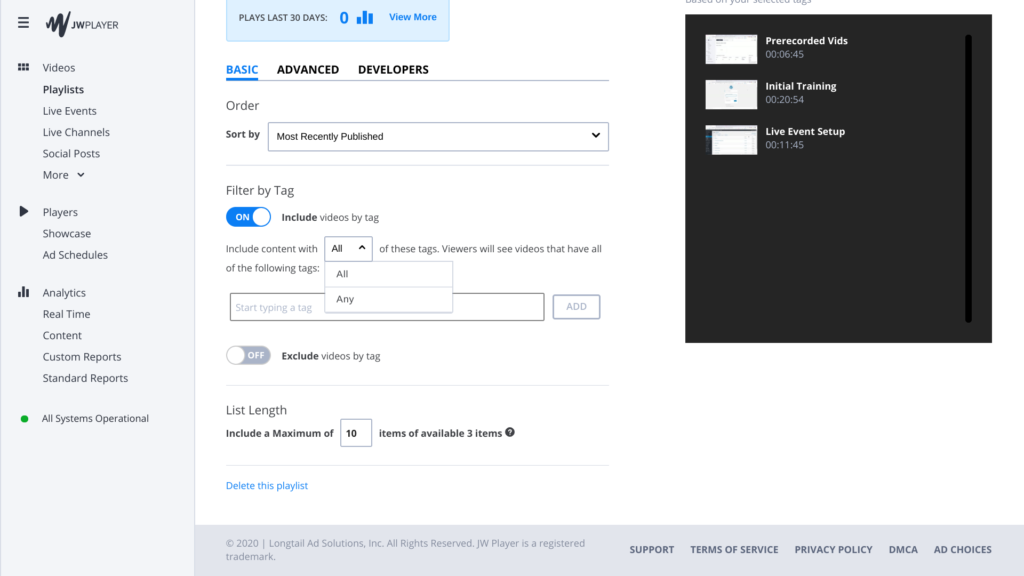
If you choose “All,” then videos that have every tag the playlist demands will be put into the playlist.
If you choose “Any,” then any video that has at least one tag that the playlist demands will be put into the playlist.
If you choose to “Include videos by tag,” whether “All” or “Any,” upload or find your desired videos, and add the tags of the playlist to the videos accordingly. They will then appear in that playlist.
6) “Exclude videos by tag”
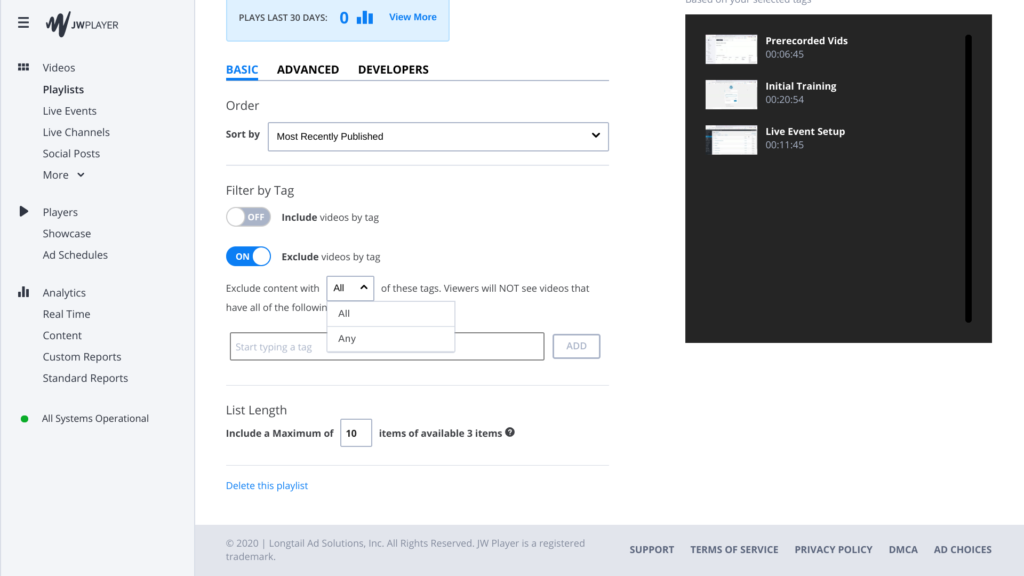
If you choose “All,” then videos that have every tag the playlist restricts will not be put into the playlist.
If you choose “Any,” then any video that has at least one tag the playlist restricts will not be put into the playlist.
If you choose to “Exclude videos by tag,” make sure whichever videos you want in the playlist DO NOT have “All” or “Any” of the tags of the playlist. Any video you want in the playlist must not have any tags you have listed in the playlist.
HOW TO ADD A PLAYLIST TO WORDPRESS
There are two ways to add a playlist to your WordPress site, and it depends on where you want to place the playlist on the page.
Method 1—Simply insert the playlist by using the JW Player plugin on WordPress.
1) Log into WordPress, and click “Pages.”
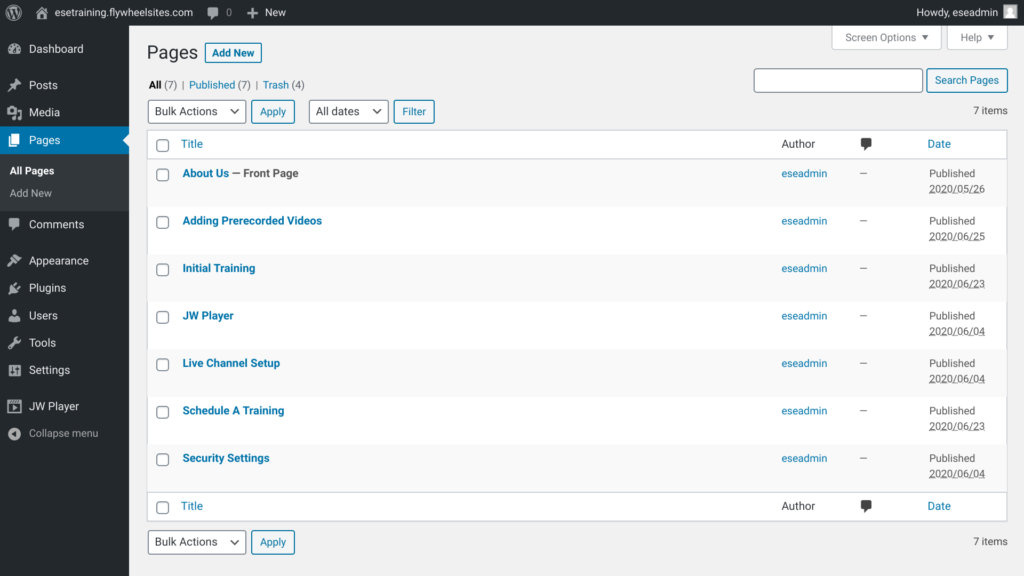
2) At the bottom of the page, the section that says “JW Player for WordPress,” click the search bar. This will show you all of your videos and playlists from JW Player. If you do not see what you’re looking for, type it into the search bar.
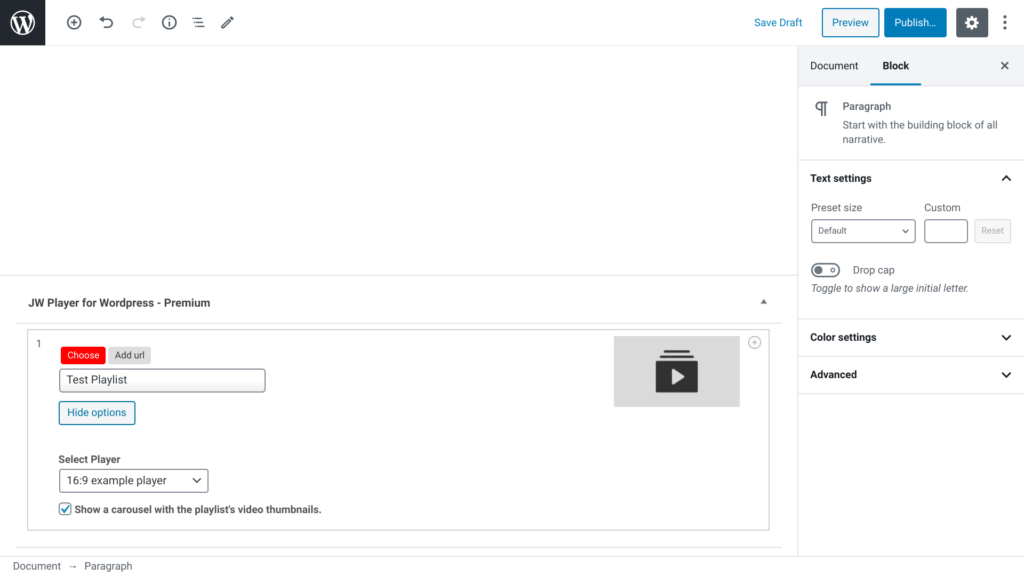
3) If you created a new page, make sure to title it, then click “Publish.” If you have edited an already existing page, click “Update.” The playlist will now appear on that page of your WordPress site.
Depending on your settings in the JW Player for WordPress plugin, the playlist will either be at the top or bottom of the page, or you can place it in a custom spot using Shortcode. To change this, go to the WordPress Dashboard > click on “JW Player” on the left toolbar > “Settings” > “Video Player position” > then choose accordingly.
Method 2—If you’d like flexibility on the location of your playlist, you must copy the Embed code from JW Player and paste it into a block on WordPress.
1) Go to JW Player, find the desired playlist, click “Embed” and copy the code.
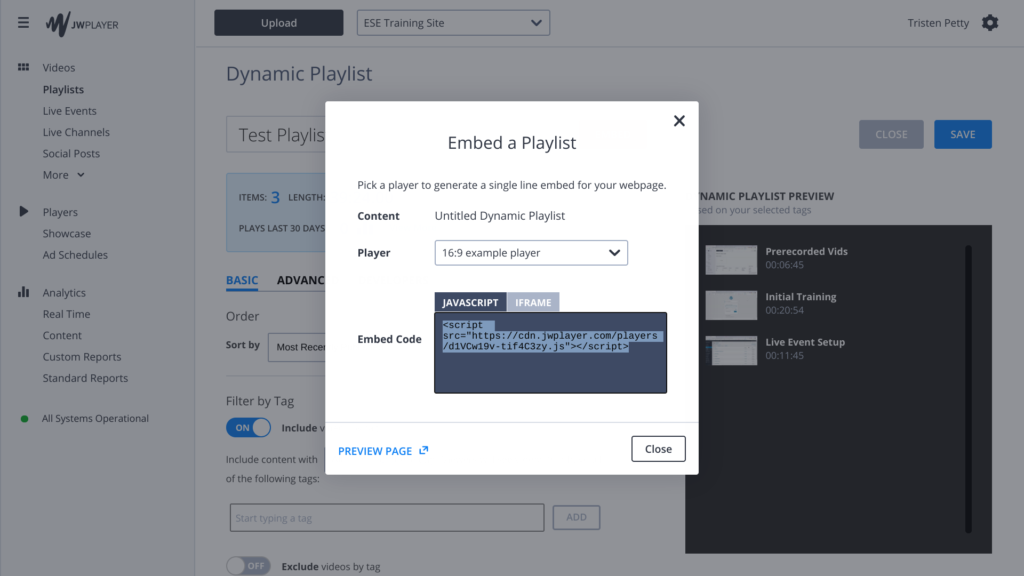
2) Log into WordPress, and click “Pages.”

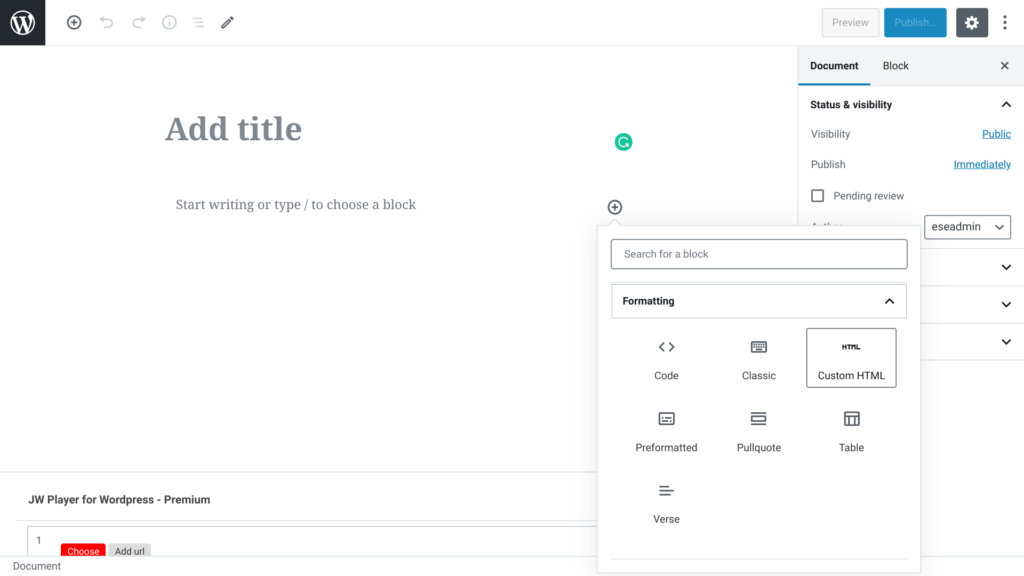
3) Click “+” to add a block > “Formatting” > “Custom HTML”
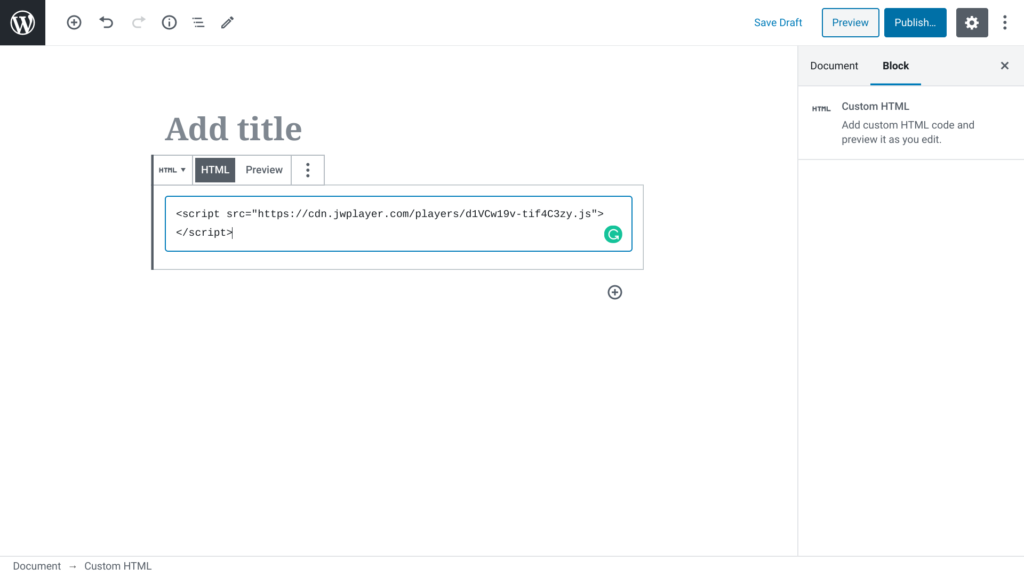
4) Paste the embed code. Because the playlist is also a block, you can move it around on the page. If you add any other blocks, such as images or text, you can choose the location of the video playlist.
5) If you created a new page, make sure to title it, then click “Publish.” If you have edited an already existing page, click “Update.” The playlist will now appear on that page of your WordPress site.
HOW TO REMOVE A VIDEO FROM A PLAYLIST
If your dynamic playlist is filtered to “Include videos by tag,” take note of the tags that are in the playlist. Then find the video in JW Player and remove the tags which are identical to the ones in the playlist. The video will then be removed from the playlist.
If you need any technical support, please call us at 877-457-5826, or email us at support@esenetworks.com, and we will be more than happy to assist you.
